Activity
Mon
Wed
Fri
Sun
May
Jun
Jul
Aug
Sep
Oct
Nov
Dec
Jan
Feb
Mar
Apr
What is this?
Less
More
Owned by Mary
Life is busy enough. Let’s make play the easy part. No pressure, no stress! Just simple, playful ways to really connect with your kids.
Memberships
Skool Events Daily
142 members • Free
Manifestation Mastery Skool
362 members • $9/month
Empire Room: Creator Lab
505 members • Free
Decster - Gamify Skool
110 members • Free
CLUES
240 members • Free
Game Vault
42 members • Free
The 10 Minutes French Club
36 members • Free
✨ SHOWCASE ✨
53 members • Free
Educate with Skool
651 members • Free
239 contributions to Connected Through Play
🔥
1d •
Welcome
Let’s extend a warm welcome to our newest community members @Allan Webster and @Michelle Fuentes We’re excited to have you here. We just finished an exploration of Easter traditions and activities and will take a breather tomorrow. This is a great time to explore the community and please introduce yourselves. To help you get started you’ll find most activities under Play Prompts or Games. We’ve just started Saturday Free4All where members are encouraged to share ideas, ask questions and more. There are some fun topics such as how to journal, springtime French words, the role of apologies, and curiosity in our lives.

🔥
1 like • 9h
@Michelle Fuentes that’s so interesting. Have you met @Celia Kibler or @Brenda Chilstrom they also work with children and families.
🔥
1 like • 9h
@Michelle Fuentes do you find this approach more effective?
🔥
23h •
Your "Street Light" Memory
I’ve been sharing so many ideas here lately, I’ve decided that this week is “spring break!” Rather than education and play prompts, let’s take this week to get to know each other and shape the next phase of our community together. Think back to that time before we were adults navigating the weight and expectations of the world. You know, when we were just kids. We didn't play for a resume or a grade; we played because the sun was up and the world was our lab. We didn’t come home until dark and everything was an adventure. I’m curious, what was one game from your childhood that you could play for hours? Was it Hide and Seek after sundown, a specific card game with your grandparents, or a world you built entirely out of sticks in the woods? Drop the name of your favorite childhood game in the comments and one thing you remember about the "feeling" of playing it. Let’s see how many of us share the same "Play DNA."

🔥
1 like • 19h
@Adam Formanek that’s pretty amazing. It sounds like game play has been key to who you are.
🔥
1 like • 13h
@Gus Gray oh, another thing in common! I also liked making fires, sadly, my dad usually frowned on my efforts as I’d attempt to make them in the alley behind the garage. We mostly played softball in the alley. I learned to hit a pretty mean line drive.
🔥
3d •
The Chemistry of Unseen Change
Saturday is Free4All day and in that spirit, I’m wrapping up our Easter week series with a bit of science. I challenge you to try this, whether you have kids at home or not. First the why and next the what. Across the Global Table, the egg is the ultimate symbol of life and renewal. We’ve spent the week decorating them, hiding them, and baking them into bread. But today, we’re going to look at the "bones" of the egg. An eggshell is made of calcium carbonate the same stuff as sea shells and chalk. When it meets acetic acid (vinegar), a chemical reaction occurs that literally dissolves the "hard exterior" while leaving the inner membrane intact. In our high-pressure world, we often focus on the "shell" the grades, the outward performance, the hard surface. But this experiment reminds us that there is a delicate, resilient "mattering" inside that is worth protecting. Today, we are practicing the "Wonder" of unseen transformations.

🔥
0 likes • 13h
@Gus Gray it’s a hard realization and it can be so hard to let that inner goodness shine. How are you showing your kids it’s okay to have both?
🔥
21h •
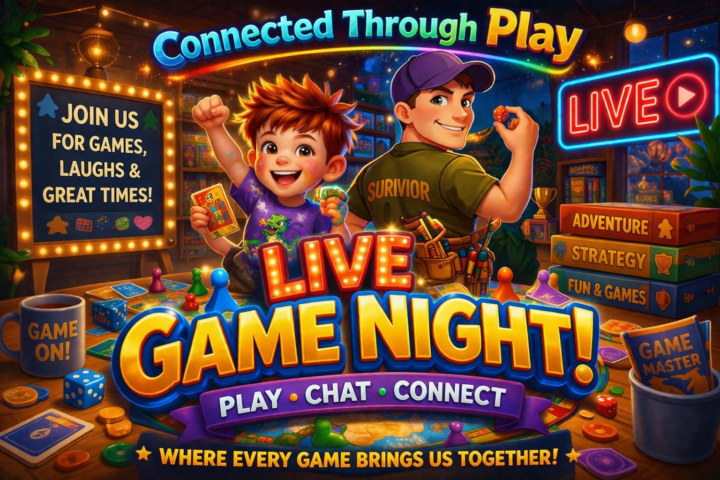
Game Night
I’m trying something new. We are hosting our first online game night with the Game Master himself, our very own @Adam Formanek. You may not know that Adam has run his own local version of the game survivor for several years. This Thursday, he will be sharing some games that can easily be recreated at home for your kids, your friends, maybe even for work. The event takes place from 7-8 pm CDT and you’ll find the Zoom link in the calendar. I hope you’ll join us. Questions? Drop them in the comments and Adam or I will do our best to answer. PS. Test your powers of observation. Can you spot the glitch in the picture? Don’t say anything til Thursday.
🔥
0 likes • 13h
@Gus Gray bummer. We will miss you
🔥
2d •
The Sculptor’s Feast
You may not know this about me but my undergrad is in history and my first career was in restaurants so I decided to combine two loves into one activity and encourage you and your families to become food historians and artists for a day. We are going to "build" a lamb using the materials in our kitchen to understand the patience required by the bakers of the past. Gather Your Gear: Two sticks of cold butter (for a Butter Lamb) OR playdough/clay (if you’d rather not play with food). Trust me, with the price of butter, I would probably go the clay route. Get Started: 1. Use one full stick of butter for the body. Cut a 1.5-inch (~ 3.8 cm) section from the second stick for the head. 2. Use a little bit of softened butter to "weld" the head to the body. 3. Now, you need to add the "wool." 4. Don't just leave it smooth. Use the tools of a "Kitchen Historian" to create texture. The Twist: The "Garlic Press Hack." If you have a garlic press, push a cold piece of butter through it to create long, curly strands of "wool" to drape over your lamb. Adjustments by Ages: Ages 3–5 (The Finger-Paint Fleece): If sculpting is too hard, have them "paint" a lamb shape using whipped cream or yogurt. Let them use their fingers to create the "curls" in the wool. Ages 6–8 (The Peppercorn Eyes): Focus on the features. Give them peppercorns, cloves, or raisins. Ask: "Why did people in the past use spices for eyes instead of other items? What does that tell us about what they had in their kitchens?" Ages 9–11 (The Banner of Victory): In tradition, the lamb often carries a red ribbon (for sacrifice) and a white banner (for victory). Have them research these symbols and create a tiny paper "Alleluia" banner on a toothpick for their lamb. Ages 12–14 (The Structural Engineer): Lamb cakes are notorious for losing their ears or heads. Challenge them to design a "support system" using toothpicks or pretzel sticks. How can they hide the supports so the "History" looks perfect?
🔥
1 like • 2d
@Gus Gray love this idea. I know what I’ll be working on in April.
🔥
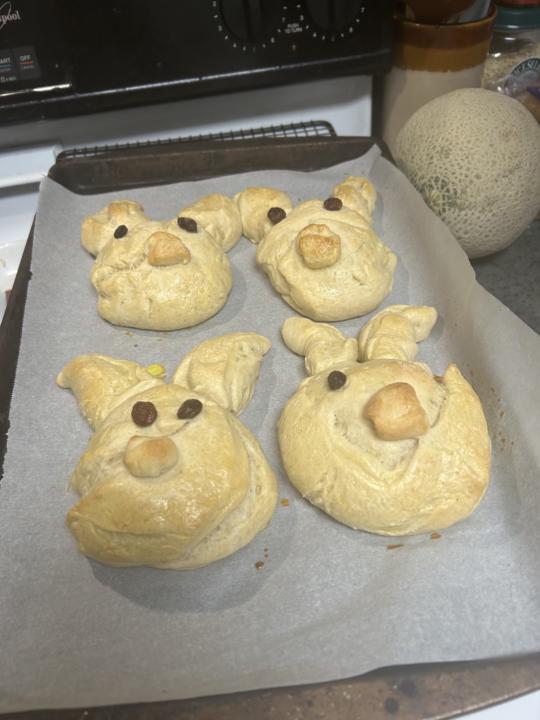
1 like • 19h
@Adam Formanek it helps if the bread isn’t over proofed🤦🏻♀️
1-10 of 239

🔥
@mary-nunaley
Former homeschool mom & learning engineer. I’ve spent years turning everyday life into a playground. Let’s bring play & connection back home.
Active 3h ago
Joined Sep 24, 2025
INTP
Nashville, TN
Powered by